Corelife Eatery

Lunch with my daughter
I went to lunch with my daughter and we decide to try out a new place to eat called Corelife Eatery.  Everything there is Gluten free and others you can just have them leave off the cheese or others are gluten and dairy free.  We tried the Rice Bowls.  My daughter tried the BBQ Ranch Chicken.  It has purple rice, corn, black beans, cheddar cheese, tomatoes, jicama, chicken, tortilla strips, coriander and basil with ranch dressing.

I tried the Korean BBQ Pork with purple rice, kimchi, cucumbers, spicy broccoli, sriracha sprouts, fried egg, slow-roasted pork and korean bbq sauce. I know I was feeling brave.  It was a little spicy but not so much that I couldn't eat it and had so much flavor.

For our drinks they have all these different lemonades.  We tried the cranberry cayenne lemonade (seasonal) and liked it a lot.  We had a coupon for buy one get one free and it was worth it.  Eating gluten and dairy free has helped me expand the variety of food I eat now.

Banana Bread - dairy and gluten free

The Best gluten free banana bread you will every try! No one will know it's gluten free.

The Best Gluten Free Banana Bread

Prep Time 15 minutes
Cook Time 50 minutes
Total Time 1 hour 5 minutes
Servings 1 loaf
Author Leigh Anne

Ingredients

  • 1 cup sugar
  • 1/2 cup oil
  • 2 eggs
  • 1 cup mashed ripe bananas
  • 1/2 cup gluten free applesauce
  • 1 tsp. pure vanilla
  • 1 1/2 cup gluten free flour Namaste
  • 1 tsp. gluten free baking soda
  • 1/2 tsp. salt

Instructions

  1. Heat oven to 350 degrees
  2. Grease and flour bottom only of a loaf pan (or use 3 small loaf pans)
  3. In large bowl, beat together sugar and oil 
  4. Add eggs, bananas, apple sauce and vanilla; blend well
  5. Lightly spoon flour into measuring cup; level off
  6. Add flour, baking soda and salt; stir just until dry ingredients are moistened
  7. Pour into prepared pan
  8. Bake at 350 degrees for 50-60 minutes (about 40 minutes for smaller loaf pan) or until toothpick inserted in center comes clean
  9. Cool 5 minutes; remove from pan
  10. Cool completely
  11. Wrap tightly and store in refrigerator
  12. Makes 1 loaf
Recipe Source Home Based Mom

Chinese Cashew Chicken- dairy and gluten free


CHINESE CASHEW CHICKEN gluten and Dairy free {30-MINUTE MEAL} PREP TIME: 

20 MIN

COOK TIME: 10 MINS

INGREDIENTS:

  • 1 1/2 pounds boneless, skinless chicken breasts, cut into 1/2- to 1-inch pieces
  • 1 teaspoon cornstarch
  • 1 teaspoon baking soda gluten free
  • 1 to 2 tablespoons olive oil
  • 2 to 3 garlic cloves, finely minced
  • 1/2 to 1 tablespoon grated or finely chopped fresh ginger (or ginger paste from a tube)
  • 1 green bell peppers, seeded, cored and diced into bite-size pieces
  • 1 to 1 1/2 cups roasted cashews (gluten and dairy free)

SAUCE:

  • 1/2 cup low-sodium chicken broth Chicken Broth gluten and dairy free
  • 1/4 cup low-sodium soy sauce La Choy Soy Sauce is gluten free
  • 1/4 cup gluten free oyster sauce (I buy at Harmon's)
  • 3 tablespoons unseasoned rice vinegar
  • 1 tablespoon cornstarch
  • 1 tablespoon honey
  • 2 teaspoons sesame oil
  • Pinch of red pepper flakes (optional)

DIRECTIONS:

  1. Place the diced chicken in a medium bowl and toss with the 1 teaspoon cornstarch and 1 teaspoon baking soda. Let the mixture rest for 15 minutes while you prep the other ingredients.
  2. Whisk together the sauce ingredients in a bowl or liquid measuring cup. Set aside.
  3. Rinse the chicken in a colander and pat dry (I leave the rinsed chicken in the colander, grab a bunch of paper towels and dab all over the surface, kind of turning the chicken as I pat dry).
  4. In a large, 12-inch nonstick skillet heat the olive oil over medium-high heat. You want the skillet very hot.
  5. Add the chicken in a single layer and stir constantly; the chicken should turn white as it cooks – but not get overly brown. Let it cook for 1-2 minutes (it’s ok if it isn’t fully cooked yet; it will cook more in the next few steps).
  6. Scoot the chicken to the edges of the pan. Add another drizzle (a teaspoon or so) of olive oil to the center of the skillet.
  7. Add the garlic and ginger to the center of the skillet and mash gently as it cooks, about 30 seconds.
  8. Add the green peppers; stir to combine the chicken, garlic/ginger, and peppers.
  9. Whisk the sauce to recombine, and add it to the skillet. Bring to a simmer and cook for 2-3 minutes until slightly thickened, the chicken is cooked through, and the peppers are crisp-tender.
  10. Remove from the heat, add the cashews, and serve over hot, cooked rice (if desired).

NOTES:

I highly recommend using low-sodium soy sauce and low-sodium chicken broth (both of which I keep on hand vs their saltier counterparts) for this recipe so the finished dish isn’t too salty. 
A note about ginger, that fresh pop of flavor really adds to this dish, but if you don’t like the taste or don’t have it, you can probably leave it out. I always grab large knobs of ginger from the produce section, chop into 1-inch pieces and pop into a freezer ziploc bag. When I need it, I pull a piece straight from the freezer and grate it on the small holes of a box grater or a rasp grater. Works perfectly!
Recipe Source
Mel's Kitchen Cafe

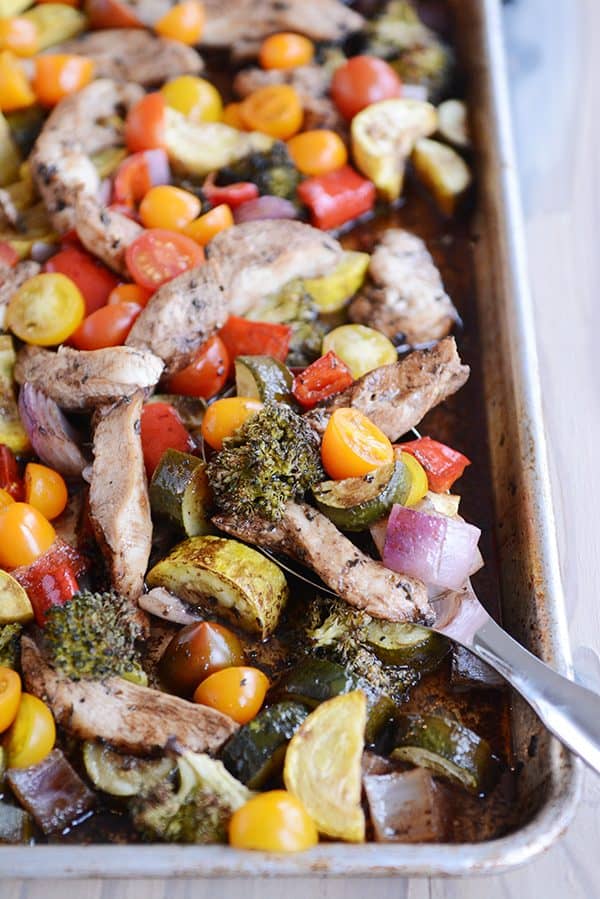
Sheet Pan Balsamic Chicken- dairy and gluten free

INGREDIENTS:

  • 2 small-medium zucchini squash, about 12 ounces, ends trimmed and cut into 1-inch pieces
  • 1 t0 2 small-medium yellow squash, about 12 ounces, ends trimmed and cut into 1-inch pieces
  • 1 red, orange or yellow bell pepper, cored, seeded, and cut into 1-inch pieces
  • 1 medium red onion, cut into 1-inch pieces
  • 1 medium head of broccoli, about 12 ounces, stem trimmed, and florets cut into 1-inch pieces or so
  • 1 to 1 1/2 pounds boneless, skinless chicken breasts, cut into thin strips
  • 1/3 cup balsamic vinegar
  • 3 tablespoons olive oil, avocado oil, or canola/vegetable oil
  • 1 to 2 tablespoons honey (depending on how sweet you want it)
  • 1 teaspoon dried basil
  • 1/2 teaspoon dried oregano
  • 1 teaspoon salt (I use coarse, kosher salt)
  • 1/2 teaspoon pepper (I use coarsely ground black pepper)
  • 1 to 2 cups cherry tomatoes, halved

DIRECTIONS:

  1. Preheat the oven to 400 degrees F.
  2. Place the chopped veggies evenly on a large sheet pan (about 11X18-inches or so). Lay the chicken strips on top of the vegetables.
  3. In a small bowl or liquid measuring cup, whisk together the balsamic vinegar, oil, honey, basil, oregano, salt and pepper (if the honey is too thick to whisk in evenly, microwave or heat the mixture for a few seconds and then whisk together). Pour the mixture over the chicken and veggies.
  4. Toss everything together until the chicken and vegetables are coated with the sauce. Arrange the ingredients in an even layer again making sure the chicken pieces aren’t overlapping each other.
  5. Bake for 12-15 minutes until the vegetables are sizzling and crisp-tender and the chicken is cooked through. Add the cherry tomatoes into the mix and give a quick toss.
  6. Serve immediately (as is, or over pasta with a sprinkle of Parmesan cheese).

NOTES:

If you like more of a cooked, juicy, burst tomato texture/taste, you can add the tomatoes during the cooking time. I like the fresh pop of adding them at the end just before serving. 
It kind of goes without saying that the vegetables are really adaptable here. You could sub out the vegetables in the recipe for other choices like asparagus, cauliflower, brussels sprouts, etc. 
If you want to roast the vegetables longer (for more tender veggies), you can either keep the chicken breasts whole instead of cutting into strips and increase the cooking time to 20 minutes for everything (or longer, depending on how thick the chicken is) OR you can start the veggies cooking first and add the chicken strips after 5-7 minutes of cooking. 
Make sure all your spices are gluten Free.  I use McCormick spices
All images and text ©.

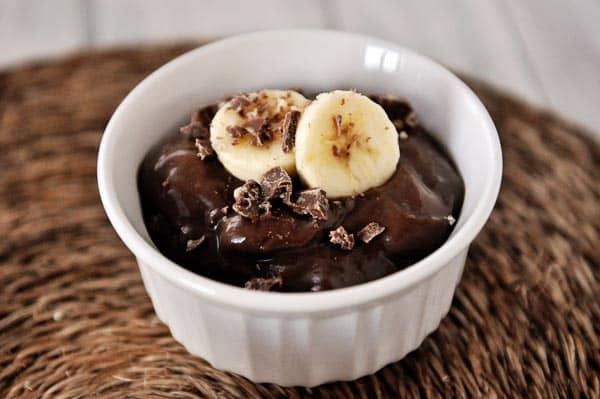
Chocolate Pudding with Pie Option - dairy and gluten free

Chocolate Pudding
Dairy and Gluten Free
Dairy Free, Egg Free Chocolate Pudding
INGREDIENTS

  • 1/3 cup granulated sugar
  • 2 tablespoons cocoa powder (unsweetened)I use Hersey's
  • 2 tablespoons cornstarch
  • 2 cups dark chocolate almond milk
  • 1/3 cup creamy peanut butter Skippy is gluten free
  • 1/4 teaspoon pure vanilla
  • sliced bananas for serving, optional
DIRECTIONS

  1. In a medium saucepan, whisk together the sugar, cocoa powder and cornstarch. Slowly pour the almond milk and whisk to combine.
  2. cook over medium heat, whisking constantly until the pudding begins to bubble.  Cook two minutes longer (while it boils and bubbles).  The mixture will be thick but pour-able and will set up more while it chills.
  3. Take the saucepan off the heat and whisk in the peanut butter and vanilla.
  4. pour the pudding into a bowl and cover with plastic wrap, pressing directly to the surface to avoid a skin forming. Refrigerate until well-chilled, 3-4 hours
  5. serve with sliced bananas(optional)
Notes
I also pour this into a graham cracker style crust to make a pie and top with So Delicious Dairy free Coco Whip
Recipe Source
Mel's Kitchen Cafe

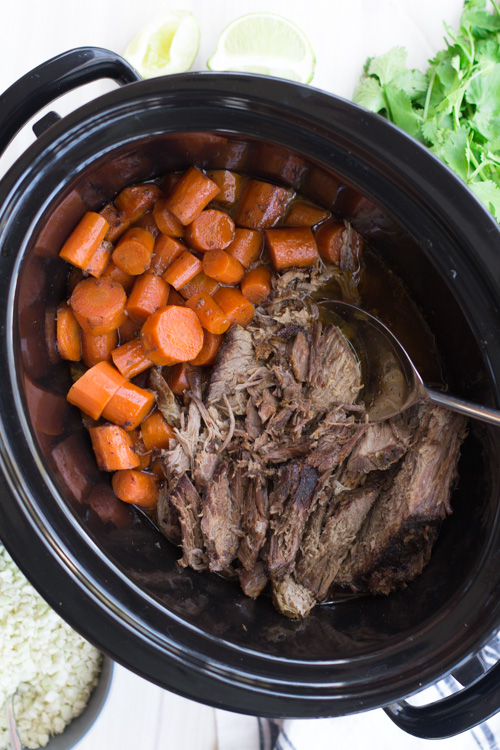
Slow Cooker Beef Roast - dairy and gluten free

Slow Cooker Beef Roast
Gluten and dairy free

INGREDIENTS

  • 2 pound boneless beef chuck roast
  • 1-2 pounds carrots bite size pieces
  • 3 tablespoons olive oil
  • 2 tablespoon red wine vinegar
  • 3 tablespoons of McCormick mesquite seasoning
DIRECTIONS

  • Combine all ingredients in your slow cooker
  • add lid and cook on low setting for 8-10 hours until beef shreds easily with a fork
Notes
You can also add the carrots and some bite size potatoes for the last 2 hours as an option.

Recipe Source
new leaf wellness

Easy Chicken Fried Rice - dairy and gluten free

Easy Chicken Fried Rice #glutenfree | iowagirleats.com


Easy Chicken Fried Rice
Gluten and Dairy Free

INGREDIENTS

  • 3 cups prepared rice
  • 3 chicken breast, cut into bite-sized pieces and seasoned with salt & pepper
  • 1 cup frozen mixed vegetables
  • 1 onion (chopped)
  • 2 clove garlic, minced
  • 3 eggs
  • 3 teaspoon olive oil divided
  • 4 tablespoons gluten free soy sauce La Choy
INSTRUCTIONS

  • Heat 1 1/2 teaspoon oil in a large wok or skillet over medium-high heat.  Add seasoned chicken then stir fry until cooked through and remove to a plate.
  • heat remaining oil in the wok then add frozen mixed vegetables and onion.  Stir fry until tender about 2 minutes, then add garlic and cook for 30 more seconds.  Push vegetables to the side of the wok then add egg into the center and scramble.
  • add cooked chicken, rice and soy sauce to work then toss well to combine.
Recipe source

Frosted Brownies - dairy and gluten free

Delicious Brownies
Image result for brownies with frosting
INGREDIENTS
2 cubes butter Earth Balance
2 cups sugar
1/3 cup cocoa
1 tsp pure vanilla
4 eggs
1 1/2 cups gluten free flour Namaste

INSTRUCTIONS
Melt butter add sugar and cocoa, mix well.  Add vanilla, eggs and flour, mix.
Pour into a 9x13 pan.  Bake at 350 for 25-30 min.

Brownie Frosting

INGREDIENTS
1/3 cup butter softened Earth Balance
1/3 cup cocoa ( I don't use quite this much)
2 cups Powdered sugar
1 1/2 tsp pure vanilla
2 Tb Almond Milk (Silk Almond unsweeted vanilla)

INSTRUCTIONS
mix all ingredients together and frost cooled brownies.

Notes
I buy my Almond Milk at Costco in a 3 pack
I use Hershey's Cocoa
Earth Balance butter sicks at Walmart
Namaste Flour at Costco

Recipie source Karey Nay

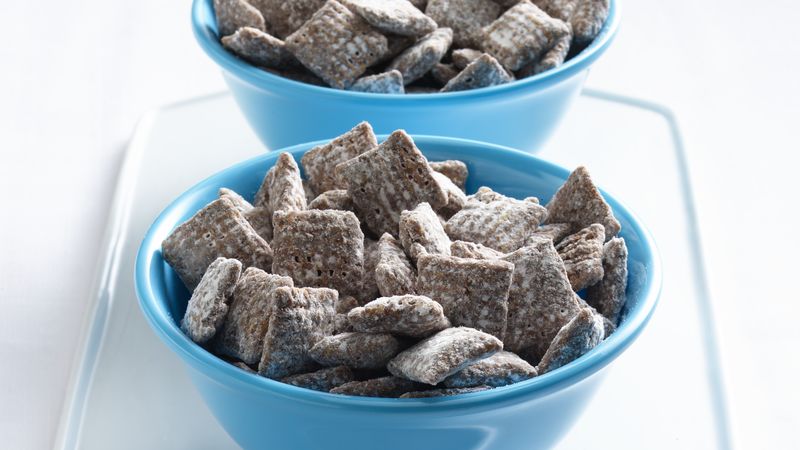
Chex Muddy Buddies- dairy and gluten free


Chexâ„¢ Muddy Buddiesâ„¢

Chex Muddy Buddies

Ingredients

9
cups Corn Chex™, Rice Chex™,  or Chocolate Chex™ cereal (or combination) 
1
cup semisweet chocolate chips Enjoy Life Mega Chunks
1/2
cup creamy peanut butter Skippy is gluten free
1/4
cup butter or margarine Earth Balance butter

1 teaspoon Pure Vanilla
       1 1/2 cups powdered sugar


Steps


  • 1
    Into large bowl, measure cereal; set aside.
  • 2
    In 1-quart microwavable bowl, microwave chocolate chips, peanut butter and butter uncovered on High 1 minute; stir. Microwave about 30 seconds longer or until mixture can be stirred smooth. Stir in vanilla. Pour mixture over cereal, stirring until evenly coated. Pour into 2-gallon resealable food-storage plastic bag.
  • 3
    Add powdered sugar. Seal bag; shake until well coated. Spread on waxed paper to cool. Store in airtight container.

Slow Cooker Ribs- dairy and gluten free

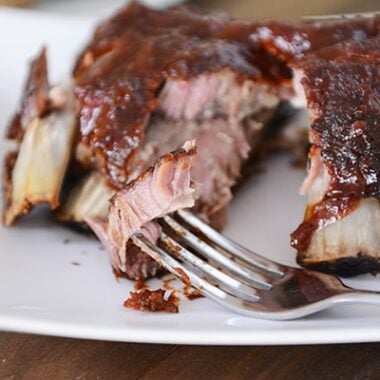
SLOW COOKER BABY BACK RIBS WITH ROOT BEER BBQ SAUCE


INGREDIENTS:

RIBS AND SEASONINGS:

  • 3 tablespoons coarse kosher salt
  • 1 tablespoon dried oregano
  • 1 tablespoon garlic powder
  • 1 tablespoon black pepper
  • 1 tablespoon chili powder
  • 1 tablespoon paprika
  • 2 racks pork baby back ribs, trimmed (see note)
  • 1 large yellow or white onion, sliced
  • 1/2 cup root beer (see note) (A&W is gluten free)

BBQ SAUCE:

  • 1 tablespoon olive oil
  • 1 1/2 cups finely chopped onion
  • 1 tablespoon minced fresh garlic
  • 1 cup root beer (A&W is gluten free)
  • 1 1/2 cups BBQ sauce ( a big fan of Sweet Baby Ray’s for Gluten free)
  • 1/2 cup apple cider vinegar
  • 1/4 cup packed brown sugar, light or dark
  • 1 tablespoon minced chipotle in adobo sauce (leave out the seeds for less heat)(Embasa is gluten free)
  • 1 tablespoon Worcestershire sauce (Lea & Perrins is gluten free)
  • Salt and pepper to taste
  • DIRECTIONS

  1. For the ribs, in a small bowl stir together the salt, oregano, garlic powder, black pepper, chili powder and paprika. Make sure to remove the membrane from the back of the ribs (simple how-to here). Spread the spice mixture over the meaty side of the ribs and rub gently until coated.
  2. Add the sliced onion and 1/2 cup root beer to the slow cooker (see note above for sizes/details) and place the ribs on top, cutting the racks of ribs to fit if needed. Cover the slow cooker and cook on high for 3-4 hours or on low for 6-7 hours.
  3. While the ribs cook, make the sauce by heating a saucepan over medium heat with the 1 tablespoon oil. Add the onions and garlic and cook on medium to medium-low, stirring often, until the onions soften and turn translucent, 7-8 minutes. Add the root beer and bring the mixture to a boil. Let it cook for 5-7 minutes until the liquid is reduced by about half.
  4. Stir in the BBQ sauce, vinegar, brown sugar, minced chipotles and Worcestershire sauce. Season with salt and black pepper – start with 1/4 teaspoon each and add more to taste.
  5. Simmer the sauce for 10-15 minutes. Let it cool slightly and then carefully process in a blender (or use a handheld immersion blender) until smooth. Refrigerate the sauce if making in advance.
  6. When the ribs have finished cooking, preheat the oven broiler and position an oven rack about 4-6 inches from the heating element. Line a large, rimmed baking sheet with foil.
  7. Carefully lift the ribs from the slow cooker using a large, flat spatula and tongs (they will be very, very tender – like, fall-apart tender) and place them in a single layer on the baking sheet. Brush liberally with the prepared BBQ sauce and broil until the sauce bubbles and caramelizes, 2-3 minutes (watch closely so it doesn’t burn).
  8. Serve ribs with the remaining sauce on the side.

NOTES:

Ok, let’s talk. Baby back ribs are simple to prepare but you do want to make sure you remove the membrane/silver skin from the underside of the ribs. The trick is using a paper towel to help grip the membrane as you peel it off.
Also, when it comes to root beer, brand matters. Choose a root beer that tastes good. Sounds silly and simple but it’s really important. We’re A&W fans around here; as long as you like the taste drinking it straight, you’re good.
Finally, slow cookers. I used my 10-year old oval slow cooker that I think is right around 6-7 quarts. The oval shape is ideal for these ribs; however, I still had to cut them in half so if you only have a round slow cooker, try cutting the ribs into smaller pieces and stacking them on top of each other or side-by-side

Make sure all your spices are gluten free.  I use McCormick but always check the label.
Recipe Source Mel's Kitchen Cafe

Snickerdoodles - dairy and gluten free


Gluten and dairy Free Snickerdoodles

Image result for snickerdoodlesIngredients
Cookie Dough
1/2 cup (1 stick) butter (Dairy Free)
1/2 cup shortening
1 1/2 cup granulated white sugar
2 large eggs
1 large egg yolk
2 teaspoon vanilla extract
2 teaspoon cream of tartar
1 teaspoon baking soda
1/2 teaspoon kosher salt
3 1/2 cups Gluten Free Flour

To coat the cookies
1 tablespoon ground cinnamon
3 tablespoon granulated white sugar

Directions
1. Preheat the oven to 350˚F. Line a baking sheet or cookie sheet with parchment paper. Take the butter out of the refrigerator and cut it into 1/2” chunks. Put the chunks into a mixing bowl of a standing mixer fitted with the paddle attachment. Put the shortening in the bowl with the butter and turn on the mixer to medium, beating them together until they are well blended. Add the sugar, and continue to beat until light and fluffy.
2. Add the eggs, one at a time beating after each addition and scraping down the sides with a spatula. Add the egg yolk and beat again. Add the vanilla and beat again. Add the cream of tartar, baking soda and salt into the butter mixture and beat well. Add the flour and beat to incorporate until smooth.
3. Combine the cinnamon and granulated white sugar for the coating together in a shallow bowl. Roll 1 tablespoon amounts of dough into 1” balls into the sugar/cinnamon mixture. Place on the baking sheets about 2” apart. Bake for 12 minutes of until the tops of the cookies start to crack a little. Try not to over bake them, but don’t underbake them either. You want them them to crack on top, but not to look to dark brown. Let them cool on the pan for 3 minutes and then move them to a rack to cool.
Makes 48 cookies.

Notes:
Flour: Namaste is the gluten free flour I buy at Costco
Spices: Make sure all your spices are gluten free. I use McCormick but always check the label
Butter: I use Earth Balance vegan buttery sticks. I buy it at Smith's
Baking Soda and Baking Powder: Make sure they are gluten free sometimes the cheaper ones are processed on a facility that uses milk or wheat. Always check the label
Vanilla Extract: Some have caramel color which bothers me so I use Pure Vanilla

Recipe source Unknown